I recently added a gallery to my website to showcase my photography work. I started with a very simple webpage that just listed the images individually. I then added image overlays with lightbox which adds a popup when you click on an image. Finally, I used some of Hugo’s features to add EXIF data from the image to the webpage. In this post, we’ll go over the process of setting this up and learn a few things about Hugo along the way.
The Simplest Approach
When I’m working on any problem, I like to get something working first - no matter how simple that first iteration may seem. Following that method, the first prototype for a gallery is a page containing a list of images that you can scroll through.
I decided to create a separate section on the website for the gallery rather than make it a blog post itself. As I am using a static site generator Hugo, configuring this will vary from theme to theme. At the time of writing I am using the paperesque theme and it provides a simple way to add a menu item to the website:
[[params.menu]]
  name = "gallery 🌊"
  url = "gallery/"
I can then add a gallery directory with an index.md file under my top-level content directory. The URL will now redirect to the gallery.
The last step is to add some actual images. Hugo provides 2 ways of dealing with images: Page resources or Global resources. I opted for page resources as it allows me to keep all images in the same directory as the gallery1.
Instead of putting them directly in the gallery folder, I created an additional img folder. The full directory structure looks as follows:
content/gallery/
├── img
│   ├── 2022_birdflight1.JPG
│   ├── 2022_burjalarab.JPG
│   ├── 2022_butterfly1.JPG
│   ├── 2022_butterfly2.JPG
│   ├── 2022_firecircle.JPG
│   ├── 2022_fox1.JPG
│   ├── 2022_neon1.JPG
│   └── 2022_neon2.JPG
└── index.md
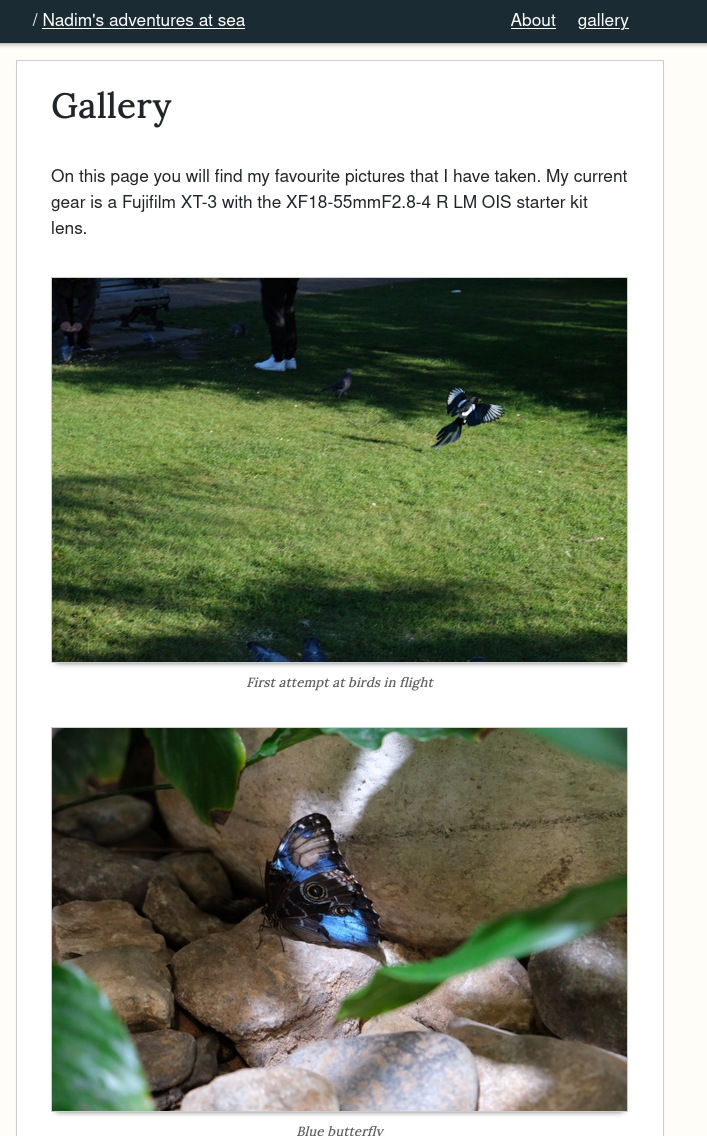
Now that we have the basic folder structure in place, we can put our images onto the webpage! This would look something like this:


...
The above works great and we get a simple gallery!

Turning Simple into Effective
The website now has a gallery, which is great! I push the code, wait for the CI to dedploy the website, and visit the webpage. I open the gallery and notice that I have time to go make myself a tea whils the page is loading.. You can imagine that loading full quality pictures is not so fast when they are not cached!
We now need to focus on turning our simple solution into an effective one. This is often the second stage of my process when working on something.
Hugo has some native ways of resizing images that we could look into, but the paperesque theme has its own shortcode called fitfigure which will resize the image to fit in its container.
We can therefore replace each image in the gallery’s markdown source file with this shortcode:
- 
+ {{<fitfigure src="2022_birdflight1.JPG" title="First attempt at birds in flight">}}
We do that for all the images, then push our code and wait for the deployment. The loading time is now much better. I was curious and profiled it with a tool called pagespeed. There still seems to be some possible improvements, but the performance is acceptable at this stage.
After this second stage, we have a gallery that not only works, but loads within acceptable amounts of time.
Always Something Better
Even though the gallery was working well, I still wanted to improve its usability both from my end and for users. The main painpoint for me is the process of adding an image which takes 2 steps:
- Add the image into
gallery/img - Add the image into a fitfigure shortcode with a title in
gallery/index.md
In terms of the user experience, the images from the fitfigure shortcode are not clickable so you need to open them in full size to see them any bigger that what they are rendered as. A user also only has one way of viewing images which is scrolling down the webpage. I wanted to make the gallery feel more like one.
Given that I do not have much experience with web design (maybe one day I’ll get around to it), I set out to get some inspiration. My favorite gallery was from Johannes Wienke. I did not want to copy it directly, but reproduce a similar experience on my own gallery.
After some further research, I decided that I would create a Hugo shortcode for the gallery. My starting point for this shortcode was taken from Christian Specht’s awesome blog post. It walks through all the detail of getting it setup, even including links to specific commits in an example github repo!
The initial shortcode looks as follows:
<link rel="stylesheet" href="https://cdnjs.cloudflare.com/ajax/libs/lightbox2/2.11.1/css/lightbox.min.css" />
<script src="https://cdnjs.cloudflare.com/ajax/libs/jquery/3.4.1/jquery.min.js"></script>
<script src="https://cdnjs.cloudflare.com/ajax/libs/lightbox2/2.11.1/js/lightbox.min.js"></script>

{{ $image := (.Page.Resources.ByType "image") }}
{{ with $image }}
    {{ range . }}
    {{ $resized := .Resize "x400" }}
    <a href="{{ .Permalink }}" data-lightbox="x"><img src="{{ $resized.Permalink }}" /></a>
    {{ end }}
{{ end }}
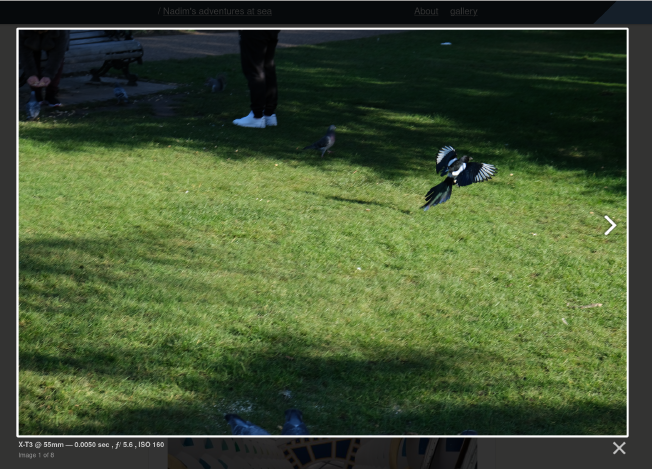
The first 3 lines link to a stylesheet and 2 javascript files from a CDN. You’ll notice the name lightbox in them. Lightbox is a script by Lokesh Dhakar that is used to overlay images on a webpage. This allows you to click on an image and get a gallery popup that you can go through.
The shortcode then gets all images from the page bundle by using .Page.Resources.ByType. If you were using global resourcees, this method would not work2.
We then iterate over the images with range . and resize each of them to x400. Finally, we create an anchor link in html with the image. Notice that the link will point to the full sized image, but the image that is displayed will be the resized image. We also include an attribute data-lightbox and set it to x. This is part of how lightbox organises images, you can think of it as assigning the image to a group of images named x.
One important change that I made to the shortcode is tuning the lightbox animations. By default, there are some effects that take close to a second, which I felt made the experience unresponsive. All settings are documented on the lightbox2 website, but these are the ones that I tweaked:
<script>
    lightbox.option({
      'resizeDuration': 0,
      'fadeDuration': 0,
      'imageFadeDuration': 0,
      'wrapAround': true
    })
</script>
Hugo shortcodes are placed in the layouts/shortcodes/ directory of a theme, so I put it into themes/paperesque/layouts/shortcodes/gallery.html.
We can now replace all of our fitfigure shortcodes in the gallery’s index.md with one simple gallery shortcode:
{{< gallery >}}
Our gallery has now been vastly improved, the users have an option to click an image and flick through all images on the webpage thanks to lightbox! We also have improved the process of adding pictures to the website since the shortcode will iterate through all images in the gallery folder!
Going Beyond
At this stage, I was very happy with the progress I made. I went from having a scroll down gallery with no clickable images, to having a lightbox-powered gallery that a user can flick through. I still wanted to make some improvements to this.
One thing that I really wanted to include was the image metadata which includes the focal length, shutter speed and aperture. This metadata comes in a standard format called Exif which is supported by most camera manufacturers.
After a bit of research, I found out that Hugo supports extracting Exif data from images. I also found a blog post that showed the data in a format that I liked. This is what I ended up with:
{{ with .Exif }}
    {{ with .Tags.Model }} {{ . }} {{ end }}
    {{ with .Tags.FocalLength }}@ {{ . }}mm {{ end }}
    {{ with .Tags.ExposureTime }} — {{ lang.FormatNumber 4 . }} sec {{ end }}
    {{ with .Tags.FNumber }} , ƒ/ {{ . }} {{ end }}
    {{ with .Tags.ISOSpeedRatings }}, ISO {{ . }} {{ end }}
{{ end }}
Here is an example of what that would look like:
X-T3 @ 55mm — 0.0050 sec , ƒ/ 5.6 , ISO 160
We can include the above template in the shortcode as the data-title attribute, which controls the text that lightbox shows when you click on an image:

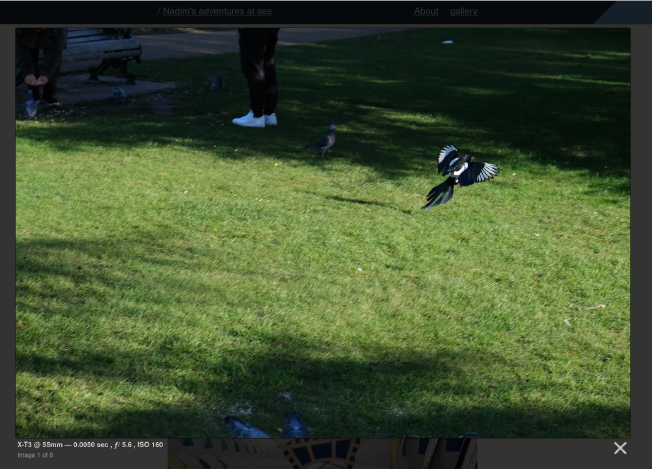
We now have image Exif data being shown! I wanted to make the border less visible which can be achieved with some inline css:
<style>
.lightbox .lb-image {
  display: block;
  height: auto;
  max-width: inherit;
  max-height: none;
  border-radius: 3px;
  border: 1px solid black;
}
</style>

Conclusion
After a lot of research and playing around with Hugo, I ended up with a much improved version of my initial gallery. Writing the process down helped me identify some small mistakes and hopefully some of the information here will help a reader someday!
The work is far from complete, a few next steps are:
- Make the gallery page span fill width of screen
- Add titles to images through Exif data
-
The URLs for images will also be
/gallery/path/to/imagerather than/static/path/to/image. You can read more about them in the official docs. ↩︎ -
See this page for an excellent overview on how to access images from shortcodes. ↩︎